How to Hang a Gallery Wall: Exact Measurements and Nail Placement
Turn a finished layout into nail marks you can trust. How to measure hang height, find the nail spot for D-rings, wire, and sawtooth hangers, and avoid the small errors that add up across a wall.
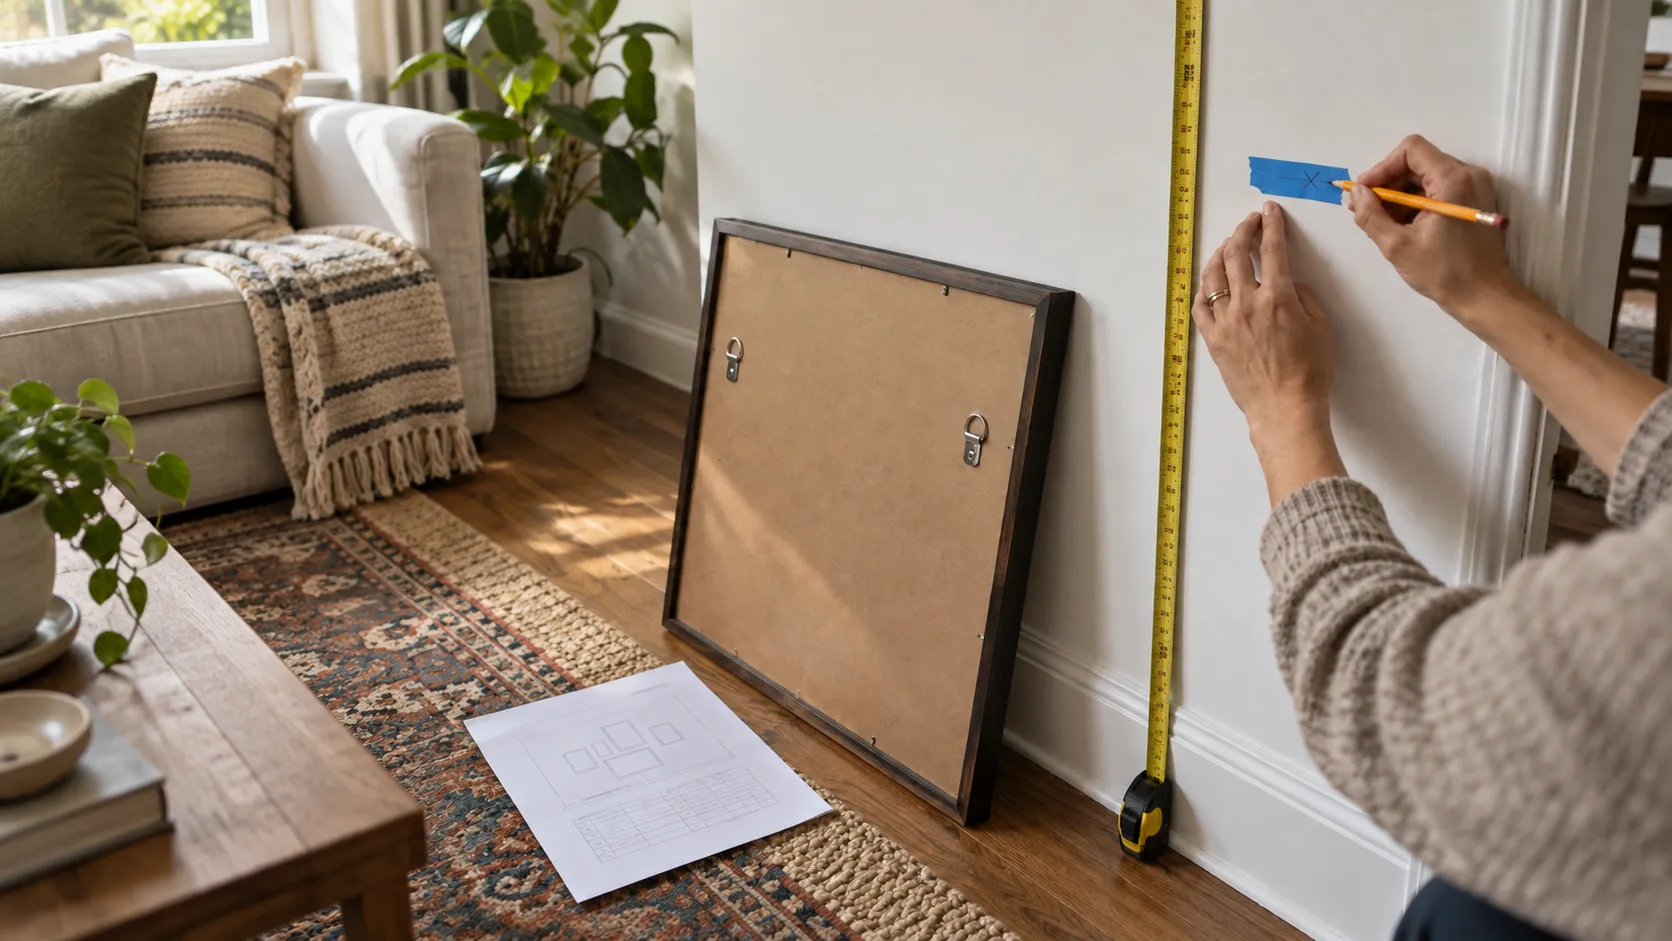
Quick answer: Hang a gallery wall so the center of the whole group sits about 57 to 60 inches from the floor. For each frame, measure from the top of the frame down to the hanger, then subtract that number from where you want the top of the frame to be. That’s your nail spot. Measure every mark from the floor and one wall edge, never from the frame you just hung.
You planned the layout. The frames are lined up on the floor and they look good. Now you’re holding a hammer, staring at a blank wall, and the plan in your head has one missing piece: where, exactly, does the nail go?
This guide covers that one step, the part between a finished plan and a hole in the wall. For picking hooks and anchors, see the hardware guide. For choosing the gaps between frames, see spacing and alignment.
Why the nail spot is never where the frame top is
Every frame hangs from something on its back. A wire, a sawtooth strip, one or two D-rings. That hanger sits somewhere below the top edge of the frame, and the nail has to go where the hanger will rest, not where the frame edge will be.
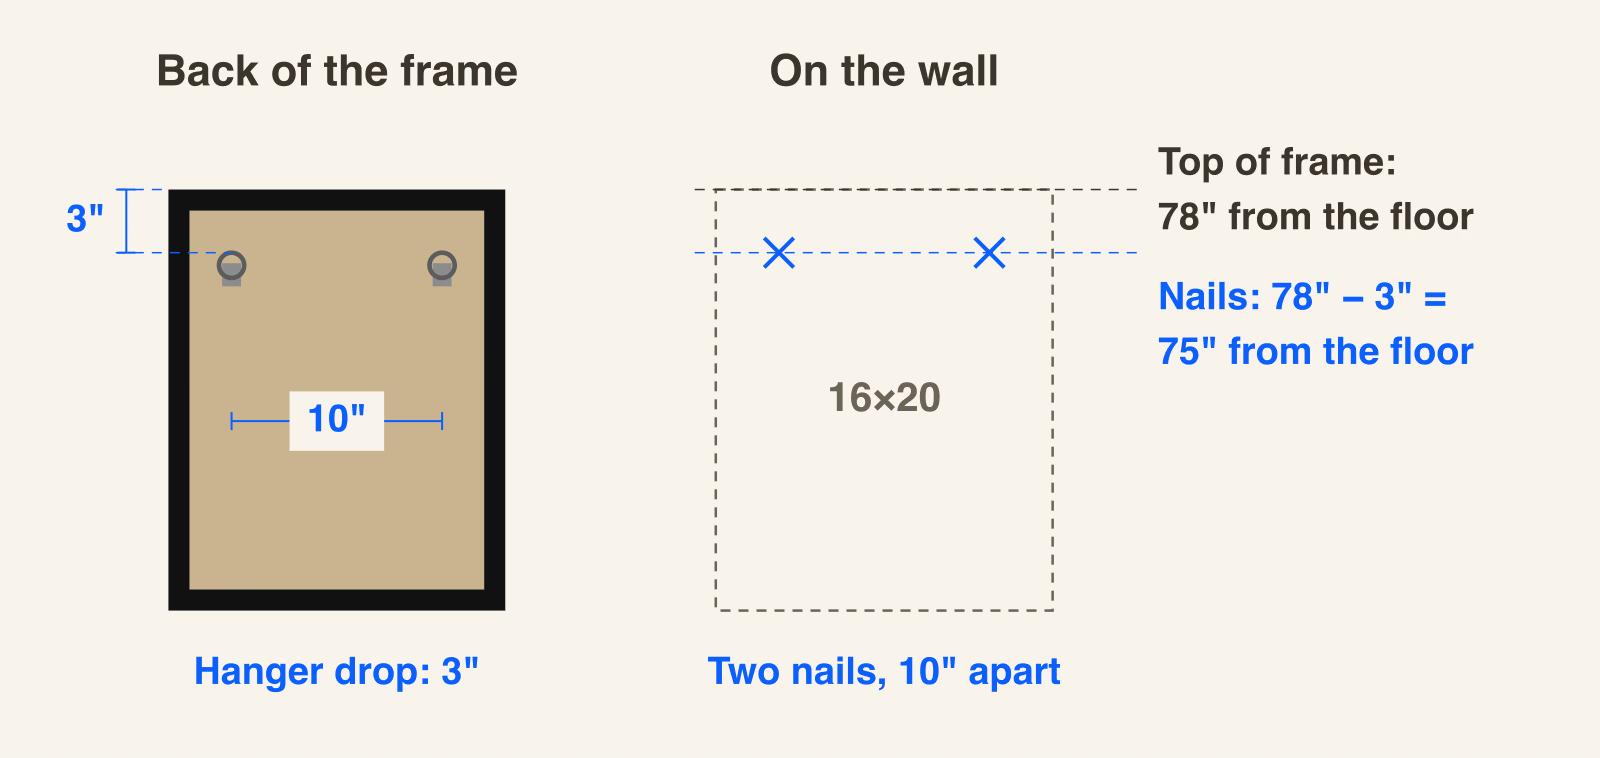
So if you want the top of a frame at 78 inches from the floor, and its D-rings sit 3 inches below the top, the nail goes at 75 inches. Skip that subtraction and the frame hangs 3 inches too high. Do it on a whole wall and some frames drop 1 inch, some drop 4, and the spacing you planned so carefully falls apart.
The fix is simple. Measure each frame’s hanger drop before you mark anything.
What you need
- Tape measure
- Pencil
- Level (a 24-inch one is easier than a small torpedo level for this)
- Painter’s tape
- Your layout with real measurements, printed or on your phone
- Hammer, hooks, or whatever hardware you picked for your wall type
If you planned in GalleryPlanner, the Hanging Guide export gives you the numbers you’ll use below. Free users can see a preview; the full PDF is a Pro export. You can also work from your own sketch as long as it has each frame’s outer size and where its edges land.
Step 1: Set your reference lines
Pick two edges everything will be measured from: the floor and one side of the wall (or the edge of the sofa, doorway, or whatever the layout is centered on).
Floors and baseboards are often not level, especially in older homes. Check with your level. If the floor tilts, mark a pencil line at a round height, say 60 inches, and check that line with the level. Measure everything up or down from that line instead of the floor.
Using the same two references for every frame is the single best thing you can do for a clean result. More on why in Step 5.
Step 2: Find where each frame’s top edge lands
Your layout tells you where each frame sits. GalleryPlanner’s Hanging Guide lists this for every frame: distance from the left edge of the wall, distance from the floor to the bottom of the frame, frame width and height, and the height of the frame’s center.
From those numbers, the top edge is easy:
Top of frame = distance from floor to bottom of frame + frame height
Say a 16 x 20 inch frame (hung tall) has its bottom edge at 58 inches from the floor. Its top edge is at 78 inches.
Write the top-edge height next to each frame in your plan before you start. It saves you from doing math on a ladder.
Working without a guide? Center the whole group, not each frame, at 57 to 60 inches from the floor. Measure the total height of your arrangement, split it in half, and add that to 58 or so. That’s where the top of your tallest frame lands. Above a sofa or console, ignore the eye-level rule and start the bottom row 6 to 10 inches above the furniture.
Step 3: Measure the hanger drop on each frame
Flip each frame over and measure from the top edge of the frame down to the point where the nail will actually hold it. The method depends on the hardware.
Sawtooth hanger. Measure from the frame top to the notch in the middle of the strip. Usually about half an inch to an inch.
D-rings (two of them). Measure from the frame top to the top inside edge of one ring. Then measure the distance between the two rings, center to center. You’ll place two nails at the same height, that far apart. Two-point hanging is worth the extra nail: the frame can’t swing crooked when someone bumps it.
Wire. Hook a finger under the wire and pull it up until it’s taut, the way a nail would. Measure from the frame top to the top of the taut wire. Don’t measure the wire hanging slack; it will sit an inch or more higher on the nail than it does lying flat.
Write the hanger drop on a piece of painter’s tape and stick it to the back of the frame. When you have twelve frames on the floor, you won’t remember which was which.
Step 4: Do the subtraction
Nail height = top of frame height - hanger drop
For the 16 x 20 frame from Step 2: top edge at 78 inches, D-rings 3 inches down. Nails go at 75 inches from the floor.
For the left-right position, the nail sits at the frame’s horizontal center. The Hanging Guide gives you that center directly. If you’re working from a sketch, add half the frame width to the left-edge distance. A 16-inch-wide frame whose left edge is 24 inches from the wall edge has its center at 32 inches.
For D-rings, split the ring spacing around that center. Rings 10 inches apart on a frame centered at 32 inches means nails at 27 and 37 inches, both at 75 inches high.
Mark each nail spot with a small pencil X. Put a strip of painter’s tape on the wall first if you don’t want pencil on paint.
Step 5: Measure every mark from the reference, never from the last frame
This is the mistake that ruins more gallery walls than any other.
It feels natural to hang frame one, then measure 3 inches over for frame two, then 3 inches over for frame three. But every measurement carries a small error. Maybe you’re off by an eighth of an inch each time. By frame six, you’re off by more than half an inch, and the last frame in the row is visibly lower or farther out than the first.
Measure each nail spot from your reference lines instead. Frame three’s nail is at 75 inches from the floor and 51 inches from the wall edge, no matter where frame two ended up. Each frame gets its own fresh measurement, so errors don’t pile up.
The Hanging Guide is built around this. Every position is given from the floor and the left edge of the wall, so you can mark all your nail spots before a single frame goes up. On a staircase wall, the guide measures each frame’s height from the stair line directly below it instead of from the floor, so use the step beneath each frame as that frame’s baseline.
Step 6: Mark everything, then check before you hammer
With every X on the wall, step back. The marks should look like a slightly shrunken version of your layout. Run your level across marks that should share a height. If one row looks off, fix the pencil mark now. Pencil is free; drywall patches aren’t.
Then hang the frames, starting with the biggest or most central one. If it ends up a hair off, you can adjust neighbors before their nails go in.
The paper template shortcut
If measuring twelve nail spots on a ladder sounds like too much, do it on the floor instead.
Trace each frame onto kraft paper or a cut-open paper grocery bag and cut the shape out. On each template, measure the hanger drop and mark the nail spot right on the paper. Tape the templates to the wall using the positions from your layout, moving them around until they match. Then hammer the nails straight through the paper marks and tear the paper away.
This is slower up front and much faster once you’re at the wall. It also lets you see the whole arrangement at full size before the first hole.
Common mistakes
- Measuring the frame top instead of the hanger. Every frame hangs low by its hanger drop.
- Measuring slack wire. The frame hangs higher than planned.
- Measuring from the previous frame. Errors add up across the row.
- Trusting the floor to be level. Check it, and use a leveled pencil line if it isn’t.
- Using artwork size instead of outer frame size. A mat and molding can add 3 to 4 inches to each side.
- Centering the group on the wall when it should center on the sofa or bed below it.
Do the math once, not twelve times
GalleryPlanner’s Hanging Guide prints the from-floor, from-left, center, and height numbers for every frame, plus the gaps between neighbors and a graph-paper diagram of the whole wall. You still measure each frame’s hanger drop yourself, since that depends on the hardware on the back. But the part people get wrong most often, keeping twelve positions straight from a single reference, is already done.
Plan your wall for free, then export the Hanging Guide when you’re ready to pick up the hammer.
Frequently Asked Questions
How high should I hang a gallery wall? Aim to put the center of the whole arrangement about 57 to 60 inches from the floor. That’s average eye level. Above a sofa or headboard, start the bottom row 6 to 10 inches above the furniture instead, even if that puts the center a little higher.
Where do I put the nail for a picture frame? Measure from the top of the frame down to the hanger (wire pulled taut, D-ring, or sawtooth notch). Subtract that from the height where you want the top of the frame. That’s the nail height. Left to right, a single wire or sawtooth nail goes at the frame’s center. Two D-rings get two nails at that height, one on each side of center, spaced the same distance apart as the rings.
Should I measure the artwork or the outer frame? Always the outer frame. The mat and molding are what you see on the wall, and they can add several inches to the art size.
Do I need two nails for a frame? Frames with two D-rings hang best on two nails at the same height. They stay level when bumped. Wire and sawtooth frames use one nail, and a dab of mounting putty on the bottom corners keeps them from drifting.
How do I keep the spacing even across a whole wall? Measure every nail position from the floor and one wall edge, not from the neighboring frame. Mark all positions first, check them with a level, then hang.
What if my floor isn’t level? Draw a pencil line at a round height with a level, and measure every frame from that line instead of the floor.
Does GalleryPlanner tell me where the nail goes? The Hanging Guide gives each frame’s exact position on the wall, including its center and the height of its edges. You measure the hanger drop on the back of each frame and subtract it, since that depends on your hardware.
Ready to Keep Planning?
Open GalleryPlanner and jump back into your current wall plan without forcing you into a specific tool first.
Launch GalleryPlanner