The Ultimate Hanging Hardware Guide
Choose the right hooks, anchors, and hanging methods for frame weight, wall type, and renter needs so your gallery wall stays secure, level, and right for the surface behind it.
The right hanging hardware depends on frame weight, wall type, and whether you need a damage-free option. Pick the hardware first, then hang the gallery wall around the actual load and surface you have.
Wall Types & Their Challenges
| Wall Type | How to Identify | Typical Homes | Difficulty |
|---|---|---|---|
| Drywall | Hollow sound when tapped | Most US homes built after 1950 | Easy |
| Plaster | Hard, dense, often crumbly | Pre-1950s homes | Medium |
| Brick/Masonry | Visible brick or stone | Lofts, exposed walls | Hard |
| Concrete | Solid, no give when drilled | Basements, modern builds | Hard |
Pro tip: For plaster walls, drill slowly to avoid cracking. For masonry, you'll need a hammer drill and masonry bits.
Hardware Quick Reference
| Hardware Type | Weight Capacity | Best For | Wall Type |
|---|---|---|---|
| Picture hooks | Up to 20 lbs | Small/medium frames | Drywall |
| Standard anchors | 25-50 lbs | Medium frames | Drywall |
| Toggle bolts | 50-100 lbs | Heavy mirrors, large art | Drywall |
| Molly bolts | 25-50 lbs | Medium frames, hollow doors | Drywall, plaster |
| Masonry anchors | 50+ lbs | Any weight | Brick, concrete |
| Adhesive strips | 3-16 lbs | Lightweight frames | Any (damage-free) |
| Picture rails | Unlimited | Frequent changes, renters | Any |
Choosing the Right Hardware
By Frame Weight
| Frame Size | Typical Weight | Recommended Hardware |
|---|---|---|
| 4×6 to 5×7 | 1-3 lbs | Single picture hook or adhesive |
| 8×10 to 11×14 | 3-8 lbs | Picture hook or small anchor |
| 16×20 | 8-15 lbs | Anchor or toggle bolt |
| 18×24 to 24×36 | 15-30 lbs | Toggle bolt or two anchors |
| Large mirrors | 30+ lbs | Toggle bolts + find studs |
By Wall Type
| Wall Type | Lightweight (<10 lbs) | Medium (10-30 lbs) | Heavy (30+ lbs) |
|---|---|---|---|
| Drywall | Picture hooks | Anchors | Toggle bolts |
| Plaster | Molly bolts | Molly bolts | Toggle bolts + studs |
| Brick | Adhesive | Masonry hooks | Masonry anchors |
| Concrete | Adhesive | Masonry screws | Masonry anchors |
Finding Studs (The Safe Zone)
Studs are the vertical wood beams behind your drywall—the strongest place to hang heavy frames.
| Method | How It Works | Best For |
|---|---|---|
| Stud finder | Electronic sensor beeps at studs | Quick, accurate |
| Magnetic | Magnets find drywall screws in studs | Silent, no batteries |
| Knock test | Tap wall—solid = stud, hollow = drywall | Free, but imprecise |
| Measure | Studs typically 16" apart from corners | Backup method |
When to use studs: Any frame over 30 lbs, or heavy mirrors. Always use studs for TVs.
Adhesive Strips (Renter-Friendly)
Damage-free hanging with proper technique.
Prep Steps (Don't Skip!)
| Step | Why It Matters |
|---|---|
| 1. Clean with isopropyl alcohol | Removes oils that prevent adhesion. |
| 2. Wait 10 minutes to dry | Moisture weakens bond. |
| 3. Apply strips to frame first | Easier to position correctly. |
| 4. Press firmly for 30 seconds | Activates the adhesive. |
| 5. Wait 1 hour before hanging | Allows full bond strength. |
Weight Limits by Brand
| Brand | Small Strips | Medium Strips | Large Strips |
|---|---|---|---|
| Command | 4 lbs | 8 lbs | 16 lbs |
| Gorilla | 5 lbs | 10 lbs | 20 lbs |
| Generic | 3 lbs | 6 lbs | 10 lbs |
Warning: Adhesive strips fail in humidity (bathrooms) and on textured walls.
Precision Hanging Hacks
The Toothpaste Trick
Mark exactly where your nail should go:
- Apply a small dab of toothpaste to the frame's hanging hardware
- Hold the frame against the wall in position
- Press gently—toothpaste transfers to the wall
- Remove frame and hammer nail at the mark
- Wipe off toothpaste residue
The Paper Template Method
For complex layouts:
- Trace each frame on kraft paper or newspaper
- Cut out the templates
- Tape templates to wall using painter's tape
- Step back and adjust until perfect
- Mark nail positions through the paper
- Remove paper and install
The Laser Level Line
For long gallery walls:
- Set up a laser level at 57-60" (eye level)
- Mark the laser line with light pencil dots
- Center your entire arrangement on this line
- Use GalleryPlanner's PDF guide (Pro Only) for exact positions
Professional Rail Systems
For damage-free flexibility:
| System | Best For | Price Range |
|---|---|---|
| STAS | Galleries, offices | $$ |
| Gallery System | Home use | $ |
| IKEA HAGHED | Budget-friendly | $ |
| Picture rail molding | Historic homes | $ |
How rails work: A track mounts once at ceiling height. Frames hang from adjustable cables—move, add, or remove art without new holes.
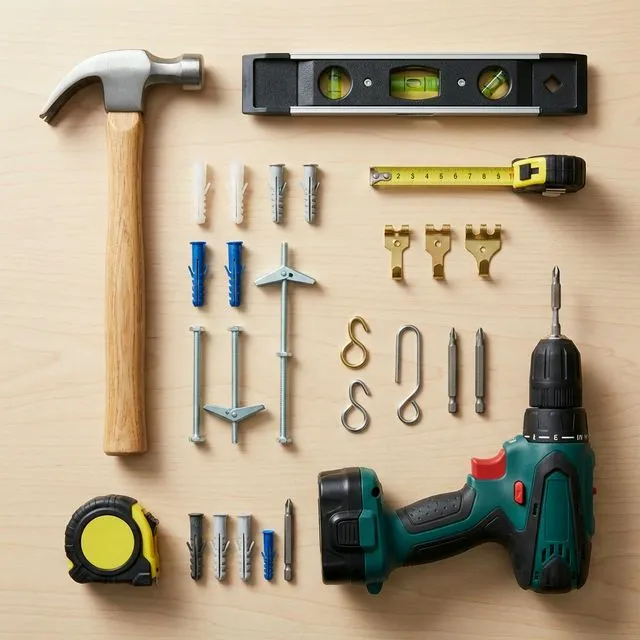
Tools You'll Need
| Tool | Purpose | Essential? |
|---|---|---|
| Drill | Pilot holes, anchors | Yes |
| Level | Keeping frames straight | Yes |
| Tape measure | Following PDF guide | Yes |
| Pencil | Marking positions | Yes |
| Stud finder | Heavy frames | Recommended |
| Hammer | Picture hooks | Yes |
| Screwdriver | Toggle bolts, anchors | Yes |
| Blue painter's tape | Paper templates | Helpful |
Hanging Sequence
| Step | Action |
|---|---|
| 1 | Print your GalleryPlanner PDF guide (Pro Only) |
| 2 | Mark the centerline at 57-60" height |
| 3 | Measure from wall edges per PDF coordinates |
| 4 | Mark all nail positions with pencil |
| 5 | Install anchors/hooks (start from center) |
| 6 | Hang frames one at a time |
| 7 | Use level to adjust each frame |
| 8 | Step back frequently to check alignment |
Ready to Keep Planning?
Open GalleryPlanner and jump back into your current wall plan without forcing you into a specific tool first.
Launch GalleryPlanner