Getting Started with GalleryPlanner
Start your first GalleryPlanner project in minutes with a quick walkthrough for wall setup, frame entry, Wall Objects, bulk CSV import, layout tools, photo levels, and an installation-ready gallery wall plan.
The fastest way to start a gallery wall in GalleryPlanner is to set your wall size, add the frames you own, and place a rough layout in a few minutes. This quick-start guide shows you the shortest path from blank canvas to first draft.
What You'll Need
Before you begin:
- Wall measurements: Width and height of the area where you want your gallery wall
- Frame inventory: Dimensions of the frames you own (or plan to buy)
- 5 minutes: That's it!
Step 1: Set Up Your Wall (30 seconds)
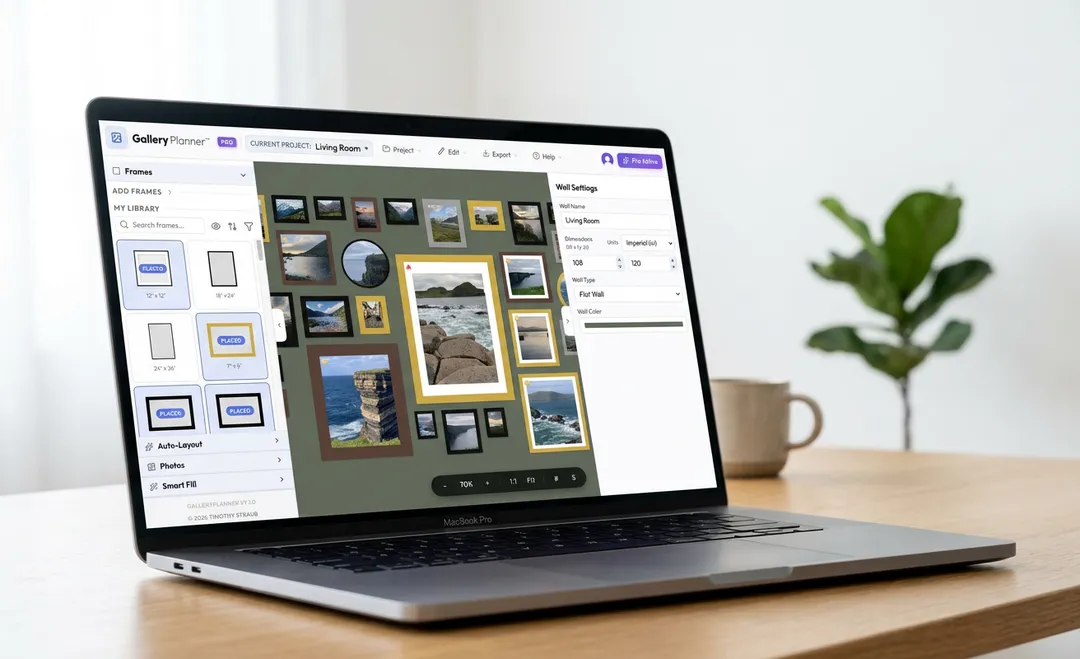
When you first open GalleryPlanner, you'll see the Wall Settings panel.
- Enter your wall width (e.g., 96 inches for an 8-foot wall)
- Enter your wall height (e.g., 72 inches for 6 feet)
- Dimensions update live as you type
Pro tip: Measure the actual area where you want frames, not your entire wall. If you're planning a gallery wall above a sofa, measure from the top of the sofa to the ceiling.
Not sure about dimensions? Start with a standard 96" × 72" wall to experiment—you can always adjust later.
Step 2: Add Frames to Your Library (1 minute)
Now it's time to add the frames you own (or want to buy).
Using Standard Sizes
Most frames come in standard sizes. Here's how to add them:
- Open the Library panel (left sidebar on desktop, bottom toolbar on mobile)
- Browse the standard sizes: 4×6, 5×7, 8×10, 11×14, 16×20, etc.
- Click the "+" button next to each size you have
- Adjust the count if you have multiples (e.g., "I have 5 8x10 frames")
Creating Custom Frames
Have an unusual frame size?
- Click "Custom Frame" in the Library
- Enter the exact width and height (measure the outer edges of the frame)
- Choose a frame color (black, white, wood, gold, or custom)
- If the frame is matted, turn matting on and pick a mat color
- Click "Add to Library"
Example: Let's say you have:
- 3 black 8×10 frames
- 2 black 5×7 frames
- 1 large 16×20 frame
Add each of these to your library by clicking the "+" button and adjusting counts.
Importing in Bulk
Have a long list of frames to enter? Open the Import tab in the Library:
- Paste a list — e.g.
8×10, 11×14, 16×20— and GalleryPlanner parses the dimensions into frames. - Download CSV template — fill in dimensions, color, mat color, label, and quantity, then upload it. The template round-trips with the Pro Shopping List export, so you can edit a previous project's frames and re-import them.
Smarter Library: Identical frames now stack automatically in My Library. Each row shows how many matching frames are already Placed, Staged, or still Available in the stack, so you can tell at a glance what is on the wall versus still waiting in inventory.
If you are planning around a TV, sofa, window, or other real wall feature, add Wall Objects (Pro) from the Objects tab before you start arranging frames. That gives Auto-Layout and Smart Fill a real obstacle to work around instead of a fake locked placeholder.
Step 3: Design Your Layout (2 minutes)
Now for the fun part—arranging your frames!
Option A: Place Your Whole Library Fast
If you want a quick first pass without comparing layout options:
- Open My Library
- Click or tap "Place all frames"
- GalleryPlanner fits as many frames as it can onto the wall
- Any extras are staged neatly below the wall so you can place or ignore them later
This is the fastest way to get your real inventory onto the wall and start editing.
Option B: Let Auto-Layout Do It
- Click "Auto-Layout" in the toolbar
- Choose a layout style:
- Structured (Grid): Clean, organized rows and columns
- Masonry: Staggered, brick-like pattern
- Skyline: Frames align at top or bottom
- Organic (Scatter): Randomized, curated feel
- Center Out (Spiral): Radiates from a focal point
- Tidy Up (Snap): Cleans and aligns an existing layout
- Click "Generate Layouts"
In seconds, GalleryPlanner will create a balanced layout using your frame inventory. Don't love it? Click "Regenerate Layouts" for a new arrangement. Preview thumbnails match your actual wall shape, including staircase walls.
Library shortcut: Click a placed or staged library row to instantly select all matching frames on the canvas.
Option C: Design Manually (More Control)
Prefer a hands-on approach?
- Drag frames from your library onto the canvas
- Position them where you want using click-and-drag
- Use alignment guides (they appear automatically) to keep frames evenly spaced
- Select a frame to reveal the floating toolbar above it for quick align, rotate, distribute, lock, and resize-mode actions
Pro tip: Start with your largest frame first—place it where you want the focal point, then build around it.
Distribute tip: Select 3 or more frames, then use Distribute Horizontal or Distribute Vertical from the floating toolbar to equalize the gaps between them in one click.
Grouping tip: Once you like a cluster, press Cmd/Ctrl+G to group it so the arrangement moves as one piece. Use Cmd/Ctrl+U or Cmd/Ctrl+Shift+G to ungroup later.
Mobile pro tip: When you're moving a frame on your phone, press and hold it for a moment first so you pick up the frame instead of panning the wall. The brief delay is normal.
Step 4: Customize Your Design (1 minute)
Once your frames are on the wall, fine-tune the details.
Adjust Frame Properties
Click any frame on your canvas to open the Properties Panel:
- Position: See exact X/Y coordinates
- Size: Width and height (custom frames can be resized)
- Rotation: Rotate to landscape or portrait
- Frame Color: Change the color even after placement
- Matting: Toggle matting on/off
- Mat Color: Adjust the mat color for matted frames
Add Photos (Optional)
Want to see what your gallery wall will look like with actual photos?
- Select a frame on the canvas
- Click "Add Photo" in the Properties panel
- Choose a photo from your device
- The photo fills the frame automatically
Once a photo is in a frame, the Photo properties panel gives you per-photo controls:
- Fit — pan, zoom, rotate the photo, or hit Reset Crop to recenter at 100% in the mat opening.
- Levels — adjust Brightness, Contrast, and Midtone sliders to balance how each photo reads on the wall. Tap Auto Level (Pro) to set all three automatically based on the photo's visible cropped region.
On mobile, these split into two sheets: Fit Edit for crop and rotation, and Level Edit for the new brightness/contrast controls.
Privacy note: Your photos stay on your device—they're never uploaded to a server. Read our privacy policy.
Step 5: Export Your Design (1 minute)
You've created your layout—now let's export it so you can hang it in real life!
Option 1: Hanging Guide (Pro Only)
The PDF gives you exact measurements, a graph-paper schematic, and a frame table for the install:
- Use "Export" in the desktop toolbar, or "Share" in the mobile bottom toolbar
- Select "Hanging Guide"
- Print it and use it as your installation blueprint
What you get:
- Full layout diagram with measurements
- Graph-paper schematic showing spacing and alignment
- Coordinates for each nail (measured from wall edges)
- Step-by-step hanging instructions
Preview example output: Sample Hanging Guide PDF
Option 2: Export a Snapshot Image
- Use "Export" → "Snapshot" (desktop), or "Share" → "Share Snapshot" (mobile)
- Use the image as a visual reference while hanging or shopping
Free Standard Snapshot: JPEG export at standard resolution with a watermark.
4K Snapshot Export: Ultra-HD PNG export at 3840px with no watermark.
Option 3: Export/Import a Project File
Come back later to make changes, or move your project between devices:
Access note: Export Project and Import Project are available on all tiers. Free access note: Free users can edit one project at a time. Additional imported projects open in view-only mode unless you upgrade to Pro.
- Export your project:
- Desktop: click "Project" → "Export Project"
- Mobile: tap the project name at the top, then use Export Project
- Download the
.gwallfile - Import it anytime:
- Desktop: "Project" → "Import Project"
- Mobile: project name → "Import Project"
Backup note: Export Project creates a portable copy that includes your wall layout and project library. On iPhone and iPad, very large exports can still fail, so keep the file in Files or iCloud once it is ready.
Auto-save: GalleryPlanner saves your work in this browser by default, so you can usually close the app and return later. If you prefer more control, open Settings and turn on manual save mode so project changes stay unsaved until you save them yourself. For important projects, also save a .gwall backup.
Install tip: On supported browsers, you can install GalleryPlanner for quicker launch. On iPhone and iPad, use Add to Home Screen in Safari for a more app-like shell. That convenience does not replace saving a .gwall backup for important work.
Option 4: Export Bundle (Pro)
Need several outputs in one pass?
- Open Export Bundle from the desktop Export menu or the mobile Share sheet
- Choose which files you want to include
- Run them together in one flow instead of exporting each file type separately
Typical bundle options include:
- Hanging Guide
- Shopping List
- Print-Ready Photos
- Snapshot Image (4K PNG)
- Export Project
What's Next?
Congratulations! You've designed your first gallery wall in GalleryPlanner. 🎉
Ready to Hang Your Wall?
Follow your exported PDF guide to install with confidence. Key tips:
- Mark nail positions with a pencil before hammering
- Use a level to keep frames straight
- Start from the center and work outward
- Step back frequently to check your progress
Want to Learn More?
Explore these resources to master GalleryPlanner:
- Complete User Guide: Deep dive into all features and pro tips
- Understanding Auto-Layout: Learn how the layout algorithms work
- Gallery Wall Design Principles: Design theory and best practices
Quick Tips for Beginners
✅ Start Simple
Your first project doesn't need to be complicated. Try a basic 3-frame horizontal row or a simple 2×2 grid to get comfortable with the tools.
✅ Use Auto-Layout as a Starting Point
Even if you want full creative control, generate an Auto-Layout first to see what's possible, then adjust it manually.
✅ Experiment Freely
You can't break anything! Try different layouts, colors, and arrangements. If you mess up, clear the wall and start over (on mobile: Edit with no frame selected → Clear the Wall).
✅ Measure Your Frames Accurately
The most common mistake? Measuring the mat or photo inside the frame instead of the outer frame edges. Always measure the full frame dimensions.
✅ Check Your Design on Mobile
Planning to shop for frames later? Save a .gwall backup and open it on your phone. It is the safest way to carry your project between browsers or devices.
If you revisit GalleryPlanner often on mobile, add it to your Home Screen so it launches like an app while you measure walls, shop for frames, or reference your layout.
Troubleshooting: First-Timer FAQs
"I don't see my frames on the canvas after adding them to the library."
→ You need to drag frames from the library onto the canvas. Adding them to the library just makes them available—placement is a separate step.
"Auto-Layout says 'Not enough frames.'"
→ You need at least 3-4 frames in your library for Auto-Layout to work. Add more frames to your inventory.
"I can't move my frame exactly where I want it."
→ Frames snap to a grid by default for alignment. Press S to toggle snap-to-grid off for free movement, or use the snap toggle in the Glass HUD.
"Where did my project go?"
→ Projects save locally in this browser unless storage is cleared. If you turned off auto-save in Settings, use the manual save control before closing or switching projects. → Check that you're using the same browser. Projects are saved locally per browser. For cross-device access, use Export Project and then Import Project.
"How do I group frames?"
→ Select multiple frames on the canvas, then press Cmd/Ctrl+G or use the context menu to group them. Use Cmd/Ctrl+U / Cmd/Ctrl+Shift+G to ungroup.
"Where is Dark Mode?"
→ Open Settings from the desktop header or the mobile menu, then choose Light, Dark, or System theme.
You're Ready!
You now know enough to build clean, practical gallery wall layouts in GalleryPlanner. The more you use it, the faster and more confident you'll become.
Questions? Visit our Help Center or email hello@gallery-planner.com.
Ready to Keep Planning?
Open GalleryPlanner and jump back into your current wall plan without forcing you into a specific tool first.
Launch GalleryPlanner