Best Frame Sizes for Gallery Walls
Learn how to mix small, medium, and oversized frames into a gallery wall that feels balanced, intentional, and scaled correctly for your space, furniture, and viewing distance.
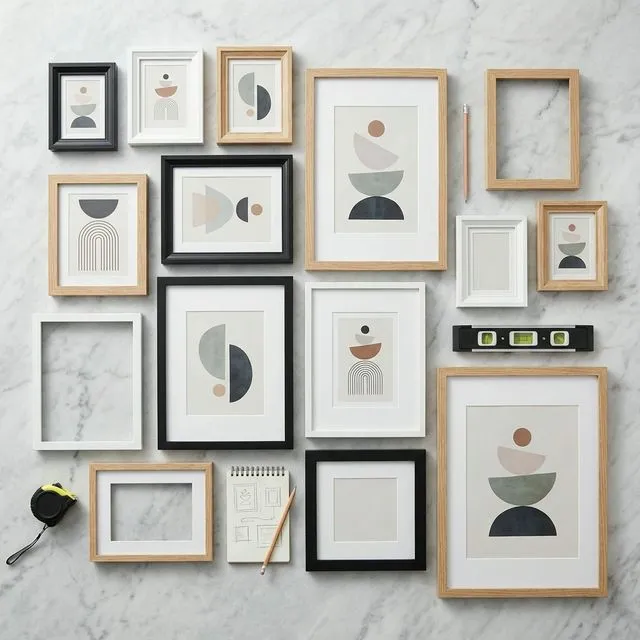
The right frame sizes are the ones that create clear hierarchy, proper scale, and enough variety without making the wall feel chaotic. Most good gallery walls mix three or four sizes and give one larger frame the anchor role.
Why Frame Size Matters
Frame size affects:
- Visual hierarchy: Larger frames naturally draw the eye first
- Balance: Heavy (large) frames need to be distributed evenly
- Proportion: Frames should scale appropriately to your wall and room size
- Cohesion: Even eclectic gallery walls need some size consistency
Getting frame sizes right is the difference between a professional-looking gallery wall and a haphazard collection of pictures.
Standard Frame Sizes: A Quick Reference
Before diving into combinations, here are the most common frame sizes you'll find at stores:
| Category | Size | Best For |
|---|---|---|
| Small | 4×6 | Standard photo prints |
| 5×7 | Slightly larger photos | |
| 8×8 | Square Instagram-style prints | |
| Medium | 8×10 | Classic portrait size |
| 11×14 | Step up from 8×10, versatile | |
| 12×16 | Wider landscape option | |
| Large | 16×20 | Statement piece |
| 18×24 | Large portrait or landscape | |
| 20×24 / 24×36 | Extra-large anchors | |
| Specialty | 10×30, 12×36 | Panoramic landscapes/cityscapes |
| 20×20, 24×24 | Large squares | |
| Custom | Special pieces worth the investment |
Pro tip: Stick to standard sizes whenever possible. They're cheaper, easier to find, and easier to replace. Reserve custom framing for truly special pieces.
The Golden Rules of Mixing Frame Sizes
Rule 1: Use Odd Numbers of Frames
Why it works: Odd numbers (3, 5, 7, 9) create visual interest and avoid the static feeling of even-numbered grids.
Exceptions: Symmetrical layouts often use even numbers for perfect mirroring (e.g., 2 frames flanking a central piece, or a 4×4 grid).
Example: Instead of 4 frames, use 5. Instead of 6, use 7.
Rule 2: Follow the 1/3 Size Rule
The rule: Your largest frame should be at least 3× larger (in area) than your smallest frame.
Why it works: This creates clear visual hierarchy and prevents frames from feeling too similar in size (which looks indecisive).
Example:
- Largest: 16×20 (320 sq in)
- Smallest: 5×7 (35 sq in)
- Ratio: 320 ÷ 35 = ~9× (well above the 3× minimum)
How to calculate frame area: Width × Height = Area in square inches
Rule 3: Limit Yourself to 3-4 Frame Sizes
Why it works: Too many different sizes creates chaos; too few creates monotony. 3-4 sizes is the sweet spot for variety without overwhelm.
Example of a well-balanced mix:
- Large: 1× 16×20 (focal point)
- Medium: 2× 11×14 (supporting pieces)
- Small: 4× 8×10 (fillers)
What to avoid: Every single frame being a different size (7 frames = 7 different sizes). Pick your core sizes and use multiples.
Rule 4: Anchor with a Large Focal Point
The rule: Include at least one large frame (16×20 or bigger) to serve as the visual anchor.
Why it works: The eye needs somewhere to land first. A large focal point creates hierarchy and guides the viewer through the composition.
Where to place it:
- Center: For symmetrical layouts
- Off-center: For asymmetrical layouts (typically placed according to the rule of thirds)
- Top or bottom: For Skyline-style layouts
Exceptions: Grid layouts with all identical frames don't need a single focal point (the grid itself is the statement).
Frame Size Combinations That Work
Here are proven frame combinations for different gallery wall sizes:
| Wall Size | Combination | Frames | Arrangement |
|---|---|---|---|
| Small (3-5) | Simple Trio | 1× 11×14 (center) + 2× 8×10 (flanking) | Horizontal row or triangle |
| Small (3-5) | Asymmetric Five | 1× 16×20 + 2× 8×10 + 2× 5×7 | Large frame off-center, smaller clustered around |
| Medium (6-9) | Balanced Mix | 1× 18×24 + 2× 11×14 + 3× 8×10 + 3× 5×7 | Salon or asymmetrical |
| Medium (6-9) | Grid Variation | 4× 11×14 (grid) + 5× 8×8 (accents) | Loose grid with squares filling gaps |
| Large (10+) | Salon Wall | 1× 24×36 + 2× 16×20 + 4× 11×14 + 6× 8×10 + 4× 5×7 | Anchor in center, build outward with smaller frames |
Creating Visual Interest Through Size Variety
Technique 1: The Size Staircase
Arrange frames in descending size order to create flow and movement.
Example: 18×24 → 11×14 → 8×10 → 5×7, stepping down diagonally or horizontally
Best for: Staircase walls, asymmetrical layouts
Technique 2: The Cluster Method
Group frames by size, then distribute clusters evenly across your wall.
Example:
- Left cluster: 1 large + 2 small
- Center: 1 medium
- Right cluster: 2 medium + 1 small
Best for: Asymmetrical, organic layouts
Technique 3: The Repeated Pattern
Use multiples of the same size to create rhythm.
Example: 8×10, 11×14, 8×10, 11×14, 8×10 (alternating pattern in a horizontal row)
Best for: Linear arrangements, modern aesthetics
Proportion: Scaling to Your Wall
Frame sizes should be proportional to your wall size. Here's a rough guide:
Small Wall (Under 40" wide)
Best frame sizes:
- Max large frame: 11×14 or 16×20
- Sweet spot: 8×10 and smaller
- Avoid: Frames bigger than 18×24 (they'll overwhelm the space)
Medium Wall (40"-72" wide)
Best frame sizes:
- Max large frame: 18×24 or 20×24
- Sweet spot: 11×14 to 16×20 for focal points
- Avoid: Too many small frames (creates visual clutter)
Large Wall (72"+ wide)
Best frame sizes:
- Max large frame: 24×36 or even 30×40
- Sweet spot: Mix from 5×7 up to 24×36
- Avoid: Using only small frames (they'll look lost on a big wall)
Rule of thumb: Your largest frame should be roughly 1/4 to 1/3 the width of your wall.
Orientation: Portrait vs. Landscape
Don't forget to consider orientation when planning frame sizes!
Mixing Orientations
Why it works: Adds dynamic visual interest and prevents monotony.
How to do it:
- Use 60-70% of one orientation (e.g., portrait) and 30-40% of the other (landscape)
- OR use a 50/50 mix for balanced eclecticism
Example:
- 4× portrait (8×10, 11×14)
- 3× landscape (10×8, 14×11)
- 1× square (12×12)
Same Size, Different Orientation
The trick: An 8×10 frame in portrait orientation looks different from an 8×10 in landscape.
Use this to: Create variety without buying different frame sizes (just rotate the frames!)
Common Frame Size Mistakes
❌ Mistake 1: Buying All Medium Frames
The problem: A wall of all 8×10 or all 11×14 frames lacks visual hierarchy.
The fix: Add at least one large frame (16×20+) and a few small accents (5×7).
❌ Mistake 2: Too Many Size Increments
The problem: 4×6, 5×7, 8×10, 9×12, 11×14, 12×16, 16×20—that's 7 different sizes for maybe 10 frames. It feels messy.
The fix: Consolidate. Stick to 3-4 core sizes and use multiples of each.
❌ Mistake 3: Ignoring the 1/3 Rule
The problem: Your "large" frame is 12×16 and your "small" frame is 8×10. That's not enough size difference to create clear hierarchy.
The fix: If your largest is 12×16 (192 sq in), your smallest should be 8×8 (64 sq in) or smaller to hit the 3× ratio.
❌ Mistake 4: Oversized Frames on Small Walls
The problem: A 24×36 frame on a 48" wall overwhelms the space.
The fix: Scale down. Use 11×14 or 16×20 as your largest frame for smaller walls.
Using GalleryPlanner to Test Frame Sizes
Not sure if your frame combination will work? Visualize it first with GalleryPlanner:
- Open GalleryPlanner
- Input your wall dimensions
- Add ALL the frame sizes you're considering (even if you're not sure)
- Use Auto-Layout to generate arrangements
- See which combinations look balanced
- Remove frames that don't fit or add more if needed
This prevents expensive mistakes like buying 5 frames in one size only to realize they don't work together.
Practical Shopping Advice
Start with What You Have
Before buying new frames:
- Inventory your existing frames (measure them!)
- Identify gaps in your size mix (e.g., "I have lots of 8×10 but no large focal point")
- Buy strategically to fill those gaps
Example: You have 6× 8×10 frames. Instead of buying more mediums, invest in 1× 16×20 (focal point) and 3× 5×7 (accents).
Shop Sales Strategically
Frame stores often have sales on specific sizes. Use these opportunities to:
- Stock up on multiples of your core sizes
- Grab a large statement piece at a discount
Pro tip: Black Friday, post-holiday sales, and end-of-season clearances are prime times for frame deals.
Buy Frames After Planning (Not Before)
The mistake: Buying random frames you like, then trying to make them work together.
The better approach:
- Plan your layout in GalleryPlanner
- Export your design with exact frame sizes needed
- Shop for those specific sizes
- Avoid impulse buys that don't fit your plan
Final Checklist: Choosing Your Frame Sizes
Before finalizing your frame selection, ask:
- Do I have one clear focal point (large frame)?
- Am I using 3-4 core sizes (not 6-7 different sizes)?
- Does my largest frame follow the 1/3 size rule compared to my smallest?
- Are my frame sizes proportional to my wall size?
- Am I using odd numbers of frames (if applicable)?
- Have I tested this combination in GalleryPlanner?
If you answered yes to all of these, you're ready to build your gallery wall! 🎉
Ready to Keep Planning?
Open GalleryPlanner and jump back into your current wall plan without forcing you into a specific tool first.
Launch GalleryPlanner