Sample Hanging Guide PDF
See the actual Pro Hanging Guide PDF export before you buy Pro. Below is a real example showing the wall, frames, exact measurements, and installation schematic - the same format you would get for any project you build in GalleryPlanner.
The sample project
- Project: Living Room
- Wall dimensions: 120" x 96" (10 ft wide, 8 ft tall)
- Eye level reference: 58-60"
- Frame count: 7 frames in a symmetric arrangement, anchored by two 26" x 38" portraits
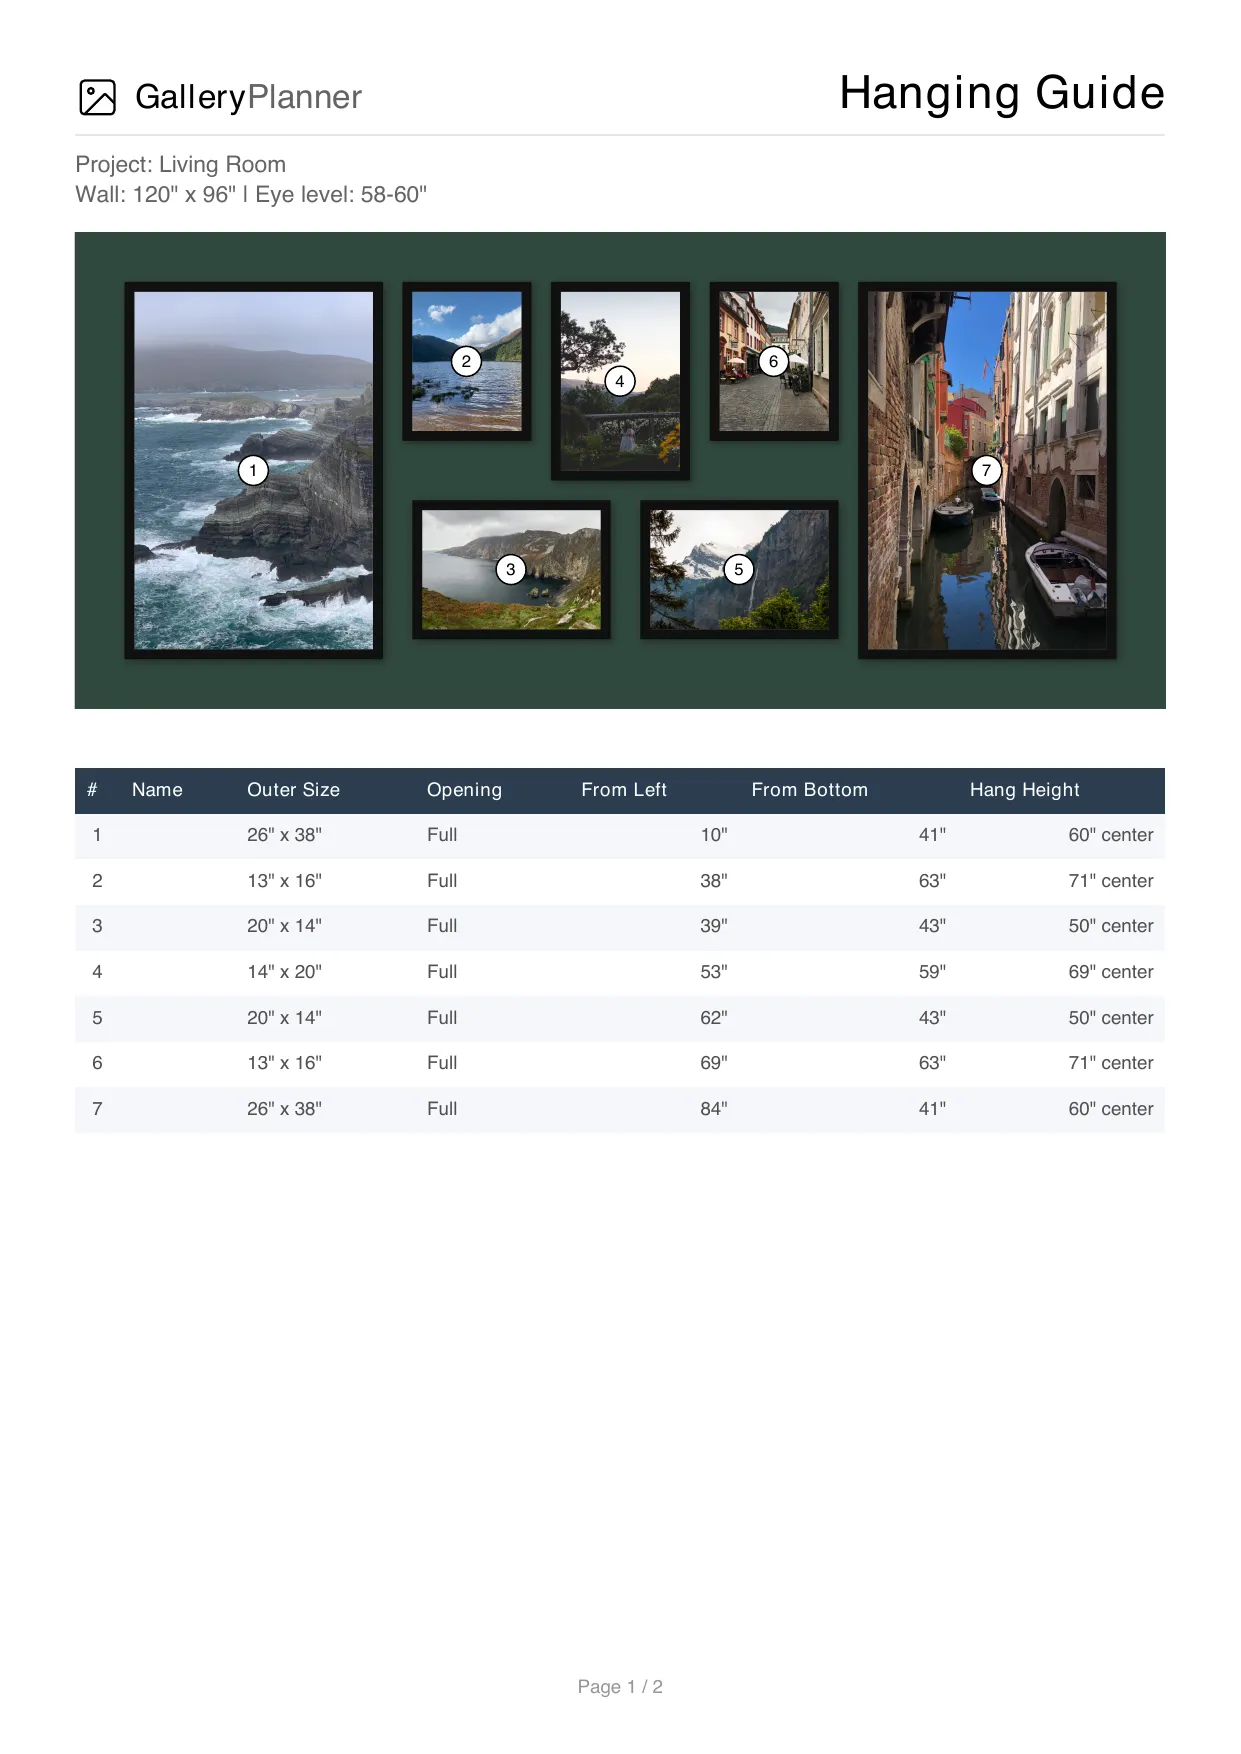
The measurement table
Every frame in the export is listed with its outer dimensions, the opening size, distance from the bottom-left corner of the wall (the origin reference), and the recommended center hang height.
| # | Outer Size | Opening | From Left | From Bottom | Hang Height |
|---|---|---|---|---|---|
| 1 | 26" × 38" | Full | 10" | 41" | 60" center |
| 2 | 13" × 16" | Full | 38" | 63" | 71" center |
| 3 | 20" × 14" | Full | 39" | 43" | 50" center |
| 4 | 14" × 20" | Full | 53" | 59" | 69" center |
| 5 | 20" × 14" | Full | 62" | 43" | 50" center |
| 6 | 13" × 16" | Full | 69" | 63" | 71" center |
| 7 | 26" × 38" | Full | 84" | 41" | 60" center |
How to read it: Measure from the bottom-left corner of the wall. From Left and From Bottom give the position of the frame's bottom-left corner. Hang Height is the center of the frame above the floor — useful for setting the picture-hanging hook so the frame ends up exactly where the schematic shows.
The measurement schematic
Page 2 of the export is a gridded scale drawing of the same wall — 6-inch gridlines, frame numbers mapped to the table, and offset annotations on the edges.

Why this helps on install day
- Less trial and error on install day
- One consistent origin point for measurements
- Real frame sizes that match the layout you built
- A two-page printout you can use on the wall
How it's generated
The Hanging Guide PDF is produced inside GalleryPlanner from the exact layout you build in the planner. Wall dimensions, frame sizes, and positions in the export always match what's on the canvas — there is no guesswork between planning and printing.
Hanging Guide PDF export is a Pro feature. See Pricing for plan options, or read What's in GalleryPlanner Pro? for the full export feature list.
Build your own Hanging Guide
Set your wall dimensions, drop in your frames, and arrange them on the canvas. When you're ready, export a Pro Hanging Guide PDF that looks exactly like the sample above — sized to your wall, not ours.
More
- Pricing — Free vs Pro, pricing, and what Pro unlocks.
- What Is GalleryPlanner Pro? — Pro feature overview and pricing bridge.
- Open GalleryPlanner — Launch the planner in your browser.